Views: 0 Author: Site Editor Publish Time: 2025-10-10 Origin: Site


You can make ceramic mugs at home with a little patience and the right approach. Good clay and safe glazes make a big difference in your results. Try using a pottery wheel if you want a classic shape, or start with hand-building if you like working with slabs. Take your time and pay attention to safety. Every step matters when you want a mug that looks great and lasts.
Pick the best clay for a strong mug. Stoneware and porcelain make tough, safe mugs for food.
Use glazes that are safe for food. Always read the glaze label before you use it.
Dry your mugs the right way to stop cracks. Cover them with plastic and let them dry slowly.
Check your mugs after glazing and firing. Look for cracks, chips, or glaze that is not even.
Be careful when making mugs. Wear safety gear and follow safety rules to stay safe.
You want your ceramic mugs to last. They should be safe to use every day. Pick good clay for your mugs. Kaolin, stoneware, and porcelain are great choices. These clays make mugs strong and safe for food. Here is a table showing the best types:
Clay Type | Firing Temp (°F) | Durability | Water Absorption | Best For |
|---|---|---|---|---|
Stoneware | 2,100–2,300 | Strong & Chip-Resistant | Low | Everyday Dinnerware |
Porcelain | 2,300–2,600 | Extremely Durable | Very Low | Fine Dining, Luxury Ceramics |
You also need glazes that are safe for food. These glazes cover the mug and make it smooth. Mugs fired at high heat are safe for food and last longer. If you want to make a Magic Cup, use special white clay. Add a coating that changes with heat. At Shandong Zenisco Trading Co., Ltd., I always check raw materials carefully. We pick feldspar and quartz. We use spray dust reduction to keep mugs safe and strong.
You do not need many fancy tools to begin. Here is what you need:
Pottery wheel or hand-building tools like slab rollers
Needles for measuring and carving
Cutter wire for splitting clay
Ribbon tools for shaping
Scrappers for smoothing
Fettling knives for trimming and sculpting
Chamois cloth for pressing clay
Calipers for measuring
Brushes for glazing
Sponges for cleaning
Towels and aprons for keeping clean
If you want to make your mugs special, use a heat press machine. This helps make Magic Cups or mugs with custom pictures. I suggest using good tools for the best results.
Want to make your mugs stand out? Try bright glazes, color-changing coatings, or fun decals. These supplies help you create unique mugs. You can add stickers or special finishes. At Shandong Zenisco Trading Co., Ltd., I offer many ways to customize mugs. You can try the Magic Cup. It changes color with heat and makes your mug collection more fun.
Tip: Always pick supplies that are safe for food. This keeps your mugs safe for drinking and daily use.
Making handmade ceramic mugs at home feels rewarding and fun. You can follow these directions for handmade ceramic mugs to get great results, whether you use a pottery wheel or hand-building methods. Let’s break down each step so you can create mugs you’ll love to use every day.
Start with clean hands and a tidy workspace. Cover your table with canvas to keep the clay from sticking. Here’s how you get your clay ready:
Grab a ball of clay and press it flat between your palms.
Roll the clay out between two rulers. Make sure it’s not thinner than your pinky or thicker than your thumb.
Cut out a circle for the base using a cookie cutter.
Roll out a slab about 3 inches by 12 inches for the mug’s wall. Smooth it with your hands or a rib tool.
Score the edges of the base and the bottom edge of the wall with a needle tool.
Brush on some slip (clay mixed with water) where you scored.
Wrap the wall around the base and blend the ends together.
Keep your clay covered with plastic when you’re not working to stop it from drying out too fast.
Use a damp sponge to smooth the top edge for a nice finish.
Tip: Always let your mugs dry until they feel bone dry before firing. This helps prevent cracks and explosions in the kiln.
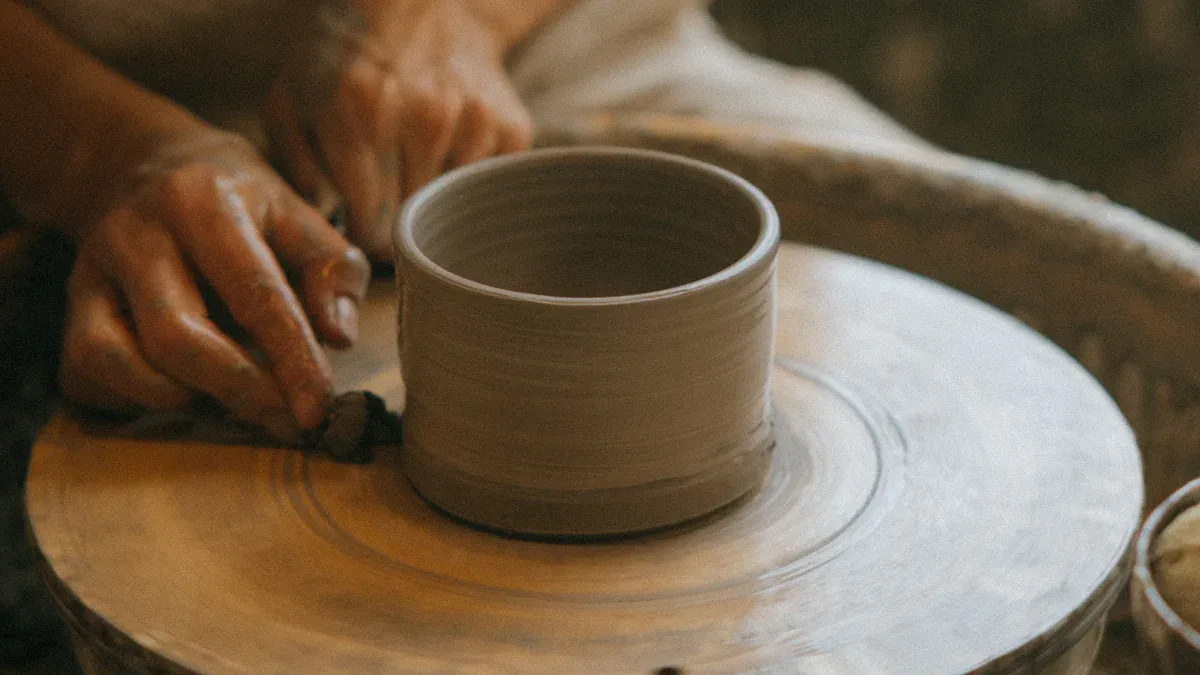
You can shape your mug in two main ways: wheel-throwing or hand-building.
Wheel-throwing: Center your clay on the wheel. Use steady hands and gentle pressure. Pull the clay up to form the walls. Keep the thickness even. Beginners often use too much water or press too hard, which can make the clay collapse. Practice with small amounts of clay first.
Hand-building: After rolling your slab, wrap it into a cylinder and join the ends. Press the seam well. Attach the base using slip and score marks. Smooth all joints with your fingers or a tool.
Check the thickness as you go. Uneven walls can cause warping or cracks later. Work efficiently and don’t over-handle the clay.
Handles make your mug comfortable to hold. Here’s how to make and attach them:
Roll out a coil or cut a strip of clay about ¼ to ⅜ inch thick.
Shape it into a gentle curve or oval. Flatten the sides a bit for a better grip.
Score both the mug and the ends of the handle with a needle tool.
Brush slip onto the scored areas.
Press the handle onto the mug and blend the joints.
Make sure the mug and handle are at the same dryness level. This helps prevent cracks or the handle falling off.
Avoid sharp edges. Smooth the handle for comfort.
Pro tip: Make a few extra handles. Sometimes one breaks or doesn’t fit right, so having spares saves time.
Drying is a slow and steady process. Rushing can cause cracks or warping.
Cover your mugs loosely with plastic. This lets moisture escape slowly and evenly.
Let them dry until they feel bone dry. This can take a few days, depending on humidity.
If you need to speed things up, you can use a kiln’s candling feature. Keep the temperature low for 6 to 10 hours to help moisture leave without causing cracks.
Even drying is more important than fast drying. If you make a batch of mugs, let them all dry together so they stay at the same pace.
Bisque firing makes your mugs strong enough for glazing.
Place your bone-dry mugs in the kiln.
Fire them at a temperature between cone 06 and cone 04 (about 1,830°F to 1,940°F).
The firing usually takes 8 to 12 hours, plus cooling time.
Let the kiln cool completely before opening it.
This first firing turns your mugs into ceramic, ready for glaze.
Glazing gives your handmade ceramic mugs a smooth, colorful, and food-safe finish.
Choose glazes labeled “food safe.” These pass strict tests and keep your drinks safe.
Avoid crackle or dry matt glazes for mugs. They can trap bacteria or stain.
Apply glaze in thin, even coats. You can dip, brush, or pour the glaze.
Follow the glaze maker’s instructions for the best results.
Wipe the bottom of your mug clean before firing. This keeps it from sticking to the kiln shelf.
Note: Test your glaze on a small piece first if you’re unsure how it will look after firing.
The final step locks in the color and finish.
Firing Type | Temperature Range (°F) | Cone Range | Firing Results |
|---|---|---|---|
Low-fire | 1,745 - 2,012 | Cone 015-1 | Softer, more porous, less durable |
Average Firing | 1,940 | Cone 04 | Vitrified, durable finish |
Place your glazed mugs in the kiln.
Fire at the recommended temperature for your glaze, usually cone 04 (about 1,940°F).
Use a slow firing schedule for the best results. This helps prevent glaze defects like pinholes or blisters.
Let the kiln cool completely before removing your mugs.
Tip: If you notice glaze problems like pinholes or blisters, try adjusting your firing schedule or glaze thickness next time.
Now you’ve finished your handmade ceramic mugs! Take a moment to admire your work. Each mug is unique and ready for daily use.

You want your mugs to look and feel great. Start by checking each mug for cracks, chips, or rough spots. Look at the glaze. Make sure it covers the mug evenly and has no drips or bubbles. At Shandong Zenisco Trading Co., Ltd., I always use a careful inspection process to make sure every mug meets high standards. Here’s a quick look at what you should check:
Inspection Type | Description |
|---|---|
Visual Inspection | Look for cracks, chips, and uneven glaze. |
Physical Testing | Check if the mug can handle bumps and hot drinks without breaking. |
Chemical Analysis | Make sure the mug is safe for food and has no harmful chemicals. |
If you find rough spots, sanding helps. Start with a 120-grit diamond disk or silicon carbide sanding screen. Wet the mug and sand gently. Move to finer grits like 220 for a smooth finish. You can use a potter’s wheel to spin the mug and sand evenly. Draw a few lines on the base with a marker. When the lines disappear, the base is flat and smooth. Always use water when sanding to keep dust down and protect your lungs.
Tip: Sanding with water makes the mug smoother and safer to use.
After sanding, your mug needs a good clean. Dust and small bits can stick to the surface. Wash your mug with mild soap and warm water. Avoid anything rough that could scratch the glaze. If your mug has a cork bottom, wash it quickly and do not soak it. Let your mug air dry completely before you use or store it. This keeps it fresh and ready for your favorite drink.
Remember: Clean mugs last longer and look better. Always check for chips or cracks before using or storing your ceramic mugs.
Staying safe while making ceramic mugs matters at every step. You want to protect yourself from heat, dust, and chemicals. Here’s a quick guide to help you stay safe:
Stage | Safety Precautions |
|---|---|
Kiln Hazards | Use insulating gloves for hot parts. Wear dark glasses when looking into the kiln. |
Dust Exposure | Wear a NIOSH-approved respirator. Avoid contact lenses in dusty areas. |
Food-Safe Glazes | Always use glazes labeled as food-safe. Fire them properly for safety. |
Sprays and Solvents | Work in a well-ventilated space. Keep sprays away from kids. |
Quartz Materials | Control dust when mixing powders. |
You should also wear the right gear. Here’s what helps keep you safe:
PPE Item | Purpose |
|---|---|
Safety goggles | Protect your eyes from dust and splashes. |
Dust mask or respirator | Keep your lungs safe from fine particles. |
Work gloves | Shield your hands from sharp tools and heat. |
Long sleeves and pants | Cover your skin from debris and chemicals. |
Tip: Always wash your hands after working with clay or glaze. This keeps you healthy and your workspace clean.
Sometimes things go wrong when making ceramic mugs. Don’t worry—most problems have simple fixes.
Cracks in mugs: Dry your mugs slowly and evenly. When you attach handles, score and slip both surfaces. Flare the handle’s end and wiggle it a bit for a strong join. Try drying mugs upside down to balance moisture.
Handle detachment: Make sure the mug and handle are at the same dryness. Score deeply and use enough slip. Avoid blending the handle too much into the mug body.
Glaze problems: Use only food-safe glazes. Apply thin, even coats. Wipe the bottom clean before firing to prevent sticking.
Chipping or scratching: Don’t stack mugs carelessly. Give them space in the dishwasher. Use gentle cleaning tools to protect the glaze.
Thermal shock: Let mugs warm up slowly before pouring in hot drinks. Avoid sudden temperature changes.
If you follow these tips, your ceramic mugs will last longer and look better. At Shandong Zenisco Trading Co., Ltd., I always focus on quality and safety, so you can enjoy your mugs with peace of mind.
You now know how to make a ceramic mug from beginning to end. Good clay and glaze help your mug last longer. They also make it feel nice to hold. Handmade mugs need more care than store-bought ones. But they are special and different. When you use your mug, you help the planet. You do not use throwaway cups.
Post pictures of your mugs on Instagram or TikTok. Use a hashtag with your brand. Join photo contests to inspire other people.
Take photos of your work or write in a pottery journal. Set small goals to keep yourself excited.
Strategy | How It Helps You Stay Motivated |
|---|---|
Photographing Work | Watch yourself get better over time |
Keeping a 'First Pot' | See how much you have improved |
Milestone Goals | Feel proud when you reach each goal |
Try making a ceramic mug yourself today. You may be surprised by what you can make!
You need to use food-safe glazes and fire your mug at the right temperature. Always check the glaze label. At Shandong Zenisco Trading Co., Ltd., I use strict quality checks to make sure every mug is safe for daily use.
Yes! You can hand-build a mug using slabs or coils. Just shape the clay by hand, join the pieces, and smooth the seams. Many beginners start with hand-building before trying a pottery wheel.
Cracks happen when your mug dries too fast or unevenly. Dry your mug slowly and cover it with plastic. Make sure the handle and body have the same moisture level. This helps prevent cracks and keeps your mug strong.
Stoneware and porcelain clays work best for strong, chip-resistant mugs. These clays fire at high temperatures and absorb less water. I always choose high-quality clay at Shandong Zenisco Trading Co., Ltd. for long-lasting results.
You can add decals, paint with underglaze, or use special glazes. For a unique touch, try a color-changing coating or a custom logo. Personalizing your mug makes it special and fun to use every day.


